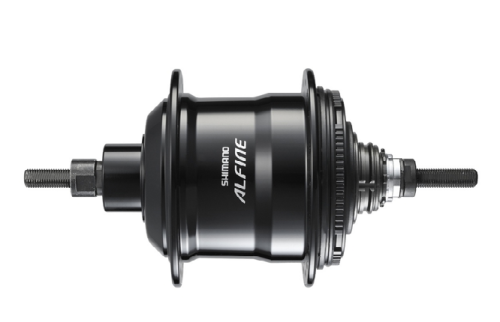
After selling my road bikes (no great need for speed anymore), I decided that I really needed a recreational bike that would require as little maintenance as possible. Internal Geared Hubs (IGH) have always intrigued me, so I bought a bike from a well known local store, Mountain Equipment Co-op (MEC) with a Shimano IGH. I’d also researched the Rohloff IGH, but pricewise it was prohibitive even though it is a well-built reliable unit
Shimano recommend an initial oil change at 1000 km and then every 5000 km or two years. So when my first 1000 km came, oil change time! The Shimano method states to drain the old oil from the hub oil port via a bleed nipple, hose and syringe, basically suck the oil out! Then add some new oil to flush the hub, drain again and refill with new oil. By the way, the oil port is very small (5mm thread) and a bleed nipple would make it even smaller!
Being from a machinery maintenance background, I didn’t think that Shimano’s method would be very adept at removing all the small metal particles from the break-in of the gears. And after draining a small amount of oil via the oil port, I saw that indeed there was a great quantity of the small metal flakes in the oil. So I decided to remove the hub from the shell and clean it out properly before adding new oil.
The following is a rundown of the procedure to accomplish what I consider to be a superior method of changing the oil and flushing out any impurities. If you’re not mechanically adept, this may seem daunting, but you could always hire your local bike shop to use this method, at least for the first two or three oil changes or until there is little to no evidence of metal particles.
After removing the wheel from the bike, remove the brake disc if so equipped.
Remove the cassette joint by lining up the yellow dots on the cassette joint fixing ring (turn counter-clockwise) which will allow it to be lifted off.
Image on the above left is normal position, image on right is removal position.
Then lift off the cassette joint (note that the red dots are aligned).
One the cassette joint is removed, lift off the plastic driver cap. Underneath that you will see a snap ring that can be pried off with a couple of small thin screwdrivers if you don’t have the correct snap ring pliers. Now you can remove the sprocket noting the direction of the dishing.
Next remove the metal dust cap and the plastic chain guard which just pulls off. Now diligently clean and degrease all the exposed areas to prevent dirt ingress into the hub’s internals.
Once everything is clean, just loosen the drive side dust cap and seal. NOTE, this has a left-hand thread, so clockwise to loosen – do not remove yet. It should be hand tight as it just has plastic threads, some rubber gloves or a rag help to get a good purchase on it.
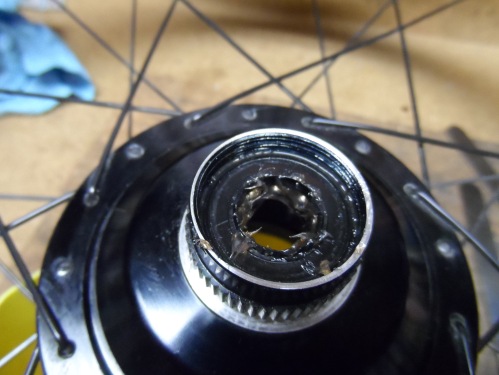
Once the dust cap is loosened, get a container ready to catch the oil from the hub after the next step which is to remove the non-drive side lock nut and cone (15mm and 17mm cone wrenches required). Position the wheel hub over the container and remove the drive side dust cap and seal assembly completely, then you can fully remove the gear cluster from the shell.
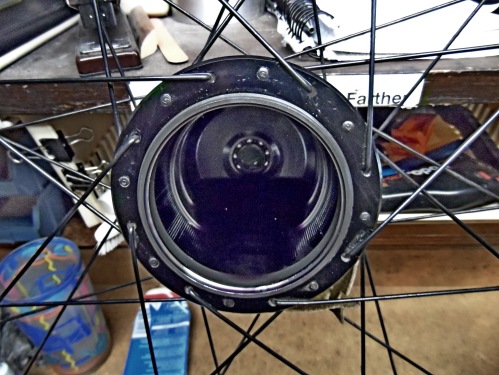
Once the gear cluster is out, the oil will drain into the container, this is when you can see the build-up of metal particles in the oil, especially when the hub is relatively new.
Flush out the hub shell, non-drive side bearing and gear cluster with a degreaser (I use a citrus based degreaser) to remove as much of the old oil as possible. Then drain and dry the all the parts and clean off any other of the removed components.
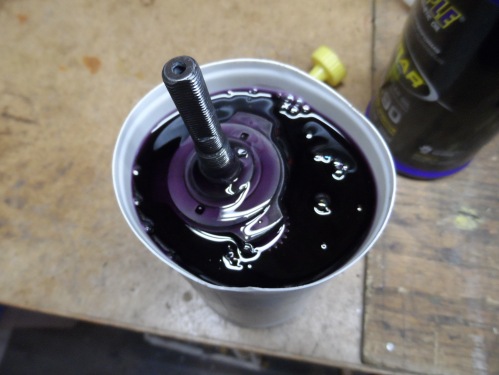
Once you’re satisfied that everything is clean it is best to pre-oil the gear cluster before reassembly. I use a cut off oil bottle or an old drink cup or anything that is a close fit to the gear cluster. Just pour the oil into the cluster and let it sit for a short while. This oil can later be saved and reused as it is only pre-lubing clean components. Shimano hub oil – SG-S700 – which is a mineral oil, is stupidly expensive so after some searching around to see what other riders are using, I decided on using Royal Purple Maxgear synthetic oil SAE 75W-90W.
Caveat… If you decide on any other oil than the Shimano recommended oil, I bear no responsibility for the outcome, I can only attest to the fact that I have used the Royal Purple now for over four years and over 25,000 km Summer and Winter riding with no adverse effects to the operation of the hub. I did try a heavier weight of the Royal Purple but found that it made the shifting sluggish in the colder winter months.
While the Gear cluster is soaking, pack the non-drive side bearing with fresh grease and grease the seals in the cone and drive side dust cap.
The hub should be ready for reassembly now and you can either add oil now or with a syringe through the oil port later. My preferred method is to pre-lube before installing the gear cluster. To pre-lube, lean the wheel at an angle so that the non-drive side bearing and edge of the hub shell are at the same angle. Pour as much oil into the shell as will allow without leaking out through either side. Lift the gear cluster out of the soaking cup and let it drain off for a short while then install it into the shell. Now screw on the the plastic dust cap and seal, remember left-hand thread, so anti-clockwise to tighten and only hand-tighten. Those plastic threads will strip easily if overtightened!
Now replace the the non-drive side cone and locknut to the correct bearing adjustment, I basically aim for no end play as judging by rotational play is difficult due to internal resistance of the hub gearing. Make sure that is not too tight as the bearings and cone will be damaged in short order.
If the shell was pre-soaked, add an extra 25 ml of oil through the oil port then reinstall the oil port screw making sure that the small o-ring is under the head of the screw.
Grease the metal dust cap that was removed and refit to the hub.
Install the plastic chain guard, sprocket, snap ring and the plastic driver cap. Finally, install the cassette joint and fixing ring lining up the red and yellow dots respectively.
My hub has had about five oil changes now and the last two resulted in very little to none of the metal contamination that I experienced when the hub was new.
And that is the whole procedure. As I mentioned at the beginning, this procedure is best performed by a bike mechanic or someone with mechanical aptitude, but it is a very efficient method to ensure that your hub internals remain as clean as possible and should extend the life of the hub for many years of riding.


Hi,
Thanks for the awesome write up, I was just wondering if there was a specific reason you picked royal purple? Or would a different brand oil of the same spec be fine. Royal purple is quite expensive and hard to source in my country is the reason for asking
Regards
Matt
LikeLike
I read that others were using Royal Purple so I tried it and it has worked fine for quite a few years now. It’s relatively inexpensive here in Canada, whereas the Shimano oil is super expensive. I suppose that any synthetic gear oil of the same viscosity would be OK, but I can’t confirm.
LikeLike
Thanks for the quick reply and insight. I’m looking at $76AUD per litre for royal purple here in Australia so that’s why I was looking for an alternative. Can get other brands such as penrite or nulon for around $30 per litre.
LikeLike
Wow that is expensive in Oz. I pay about CAN$20 here. Sure try some other oil if you’re comfortable with it.
LikeLike
Glad to hear you’re still riding. Enjoy you new bike
LikeLiked by 1 person
Well done Adam, you have always done a proper and efficient way of doing things, much appreciated by all.
LikeLiked by 1 person